Showing posts with label garden of eatin'. Show all posts

Tuesday, October 13, 2009

I eat local because I can...

A long, busy summer has gone by since I last took the time to sit down and garden blog. There's something about the late summer, with the heat and the whole yard drying to a crisp and even the weeds punking out that kind of diminishes garden fever, until the spring catalogs arrive.

This summer I've had lots of landscaping projects in mind, but knowing that we were about to have the roof torn off of our house and reconstructed gave me pause: "Hmm, those guys are paid to demolish and build, they're not paid to tiptoe gently around the tulips." Nope, not at all. And I'm glad, now that construction is underway (pictures to come -- the transformation on our house is astonishing) that I did put off my summer projects. It looks like a mini-tornado has been through. Fortunately the shrubs next to the house are practically indestructible.


Eating local, whether out of the garden, the farmer's market, or nearby farms, has been a common theme this summer, and will continue all winter. I've dried several pints of sun-dried tomatoes, canned whole bushel (42 pints) of peaches from a local farm and 40 pints of pears from a friend's pear tree, and froze 60 pounds of blueberries from a blueberry farm. Oh, lordy, the flavor of home-canned peaches is incomparable. Nectar. Ambrosia. Food of the gods. I'm glad I put up double of what I usually put up, so I don't have to try to make them stretch and can have home-canned fruit salad when I want. Alas, I missed the cherry harvest and didn't get cherries put up. Try again next year.

All those shiny, colorful jars of produce look so nice on the pantry shelf, and give me a smug, self-sufficient feeling. If we're snowed in this winter, we'll certainly have enough fruit to eat. Maybe not a whole lot else, but fruit, yeah, we have it!

Tuesday, July 08, 2008

Local eating: cherry time

You start with some of these, fresh-picked from a local orchard;
Take the pits out using a cherry pitter, if you wish -- or leave them in as my grandmother did to add a hint of almond flavor (and you never have to wonder if a cherry has a pit in it because they all do):

Sometimes you get some "help" with the pitting. This is The General, having a fruity snack:

Load the cherries into jars with some hot sugar syrup (1 part sugar to 4 parts water for light syrup), leave about 1/2 inch air space, wipe the tops, put on new lids, screw on the rings, and put them in a canner -- in this case, my new steam canner, which uses a lot less water and a lot less electricity than my old water bath canner, and won't endanger my glass-top stove:

And after processing for 25 minutes and tightening the rings, voila!

Today's score: out of about 19 pounds of cherries, I canned up 28 pints of dark cherries and a few left for fresh eating. All but two of the pints sealed. I may reprocess the failed two, or just eat 'em now. Tomorrow I'll wash the jars and put them away for the winter.

It's such a good feeling to have glistening jars of jewel-bright canned fruit filling the pantry shelves. You feel like you're heading into winter ready for anything. As a bonus, home-canned fruit tastes ever so much better than store-bought, especially peaches. Store-bought canned peaches are bland, peach-flavored plastic. Home-canned peaches, put up at the peak of ripeness, are pure ambrosia.

Tuesday, June 10, 2008

How limited our tastes

Maybe I've just been reading too much Michael Pollan, but now as I look at the vast array of products in the supermarket, I see a whole lot of sameness. Two big grains, corn and wheat, in every product that contains flour (which counts for the majority of snack foods and processed foods), with a smattering of rice, rye, and barley. A half-dozen kinds of dry beans: "white," "kidney," "pinto," "black," "garbanzo," and sometimes, "black-eyed peas." Fruits? Apples, pears, oranges, peaches, nectarines, grapes, cherries, melons -- now we seem to be getting somewhere, as we add in the veggies: lettuce, carrots, celery, beets, turnips, chard, cabbage, broccoli, kale, brussels sprouts, cauliflower, peppers, squash, potatoes... and yet...and yet...

I've been reading a book I found at a used book store some time ago, Kitchen Gardening in America by David M. Tucker. It's out of print, alas, but it's not too hard to find used. I have a bit of a beef with the section where he describes most Native American practices as being based in "magic" (as though wise elder women couldn't figure out a more earthbound explanation of why ashes or fish made corn grow better), but otherwise it's an interesting history of gardening in America, looking at both Native American and European roots.

Native people who farmed, as many gardeners know, grew the plants that have come to be called the "three sisters": corn, squash, and beans. They also grew sunflowers for the seeds and Jerusalem artichokes for the nutritious tubers. These, with the addition of meat that the men brought in from the forest, formed the staples of the diet of many native groups. The staples, mind -- for while the women tended the fields throughout the year, they didn't have to work at it daily. They spent a good deal of their time in the forest, too, not hunting as the men did, but gathering forest and meadow plants. Nations of the eastern seaboard gathered something near two hundred different wild plants for food, including greens, roots, and berries.

Nearly two hundred. That makes the selection in the produce section look downright puny.

Turning to the European tradition, the same book lists a 17th century recipe for mutton stew that includes violet leaves, endive, succory (a relative of endive, it seems -- I had to look that one up), strawberry leaves, spinach, calendula flowers, green onions, and oatmeal. Lots of greens that we no longer consider food went into the pot, some simply for food value, some that were considered preventative medicine. The Medieval Garden by Sylvia Landsberg lists many more: dandelions, Alexanders, nettle, mallow, wood sorrel, betony, daisies, dead nettle, rockets, rampion... the list goes on and on.

Here I thought I was being wild and crazy when I ordered seeds for purple carrots and Flashy Trout's Back lettuce.

The advantage to eating a wider selection of foods is that so many foods have so many different pigments and other interesting substances that we lump under the generic heading of "phytonutrients": beta carotene, anthocyanins, lycopenes, lignins, various vitamins, and a whole lot more and even more yet to be discovered. The broader your range of foods, the more likely you'll take in the range of phytonutrients that will keep you in the best of health.

Those Medieval ladies who threw strawberry leaves and violets in the pot had something good going.

Good seed catalogs that carry heirloom vegetables often list lots of interesting, little-known vegetables not found at the supermarket. Not just different varieties, but entirely different vegetables from different gardening traditions. Next season I plan to delve into some of those, as well as look into cultivating patches of some of the native plants from my area that used to feed the people who lived here long before my ancestors came. With a degree in botany, I know enough to distinguish the edible from the poisonous. I already have Siberian Miner's Lettuce (Claytonia sibirica) in the yard. There's a start.

As for the camas (Camassia quamash) bulbs that the Kalapuya people in my area used to harvest -- doggone but the bulbs for sale in the catalogs are too expensive to eat. I'll just have to wait until my camas patch gets bigger.

Thursday, May 22, 2008

Read your fruit

You know those little sticky labels on your fruit, the things you have to remember to peel off or they get annoyingly stuck between your teeth? The ones with a little number on them? Ever wonder what the little number is for?

Those are PLU numbers -- product look-up numbers. They're 4-digit numbers established by the International Federation for Produce Coding, and each number corresponds to a particular kind of fruit. The grocery store codes them into the price scanning system, so all the clerk has to do is type in the number and voila, the system spits out the price-per-pound of your navel oranges or Bosc pears.
Every now and then, however, you may run across a 5-digit number, and that's where things get a little more interesting. If the first digit is a 9, that's a code for organic produce. They get their own special digit because, as we all know, the stuff costs more so the organic Gala apples get a higher price in the system than the grown-with-pesticides Gala apples. If the first digit of the 5-digit number is an 8, what you've got is genetically-modified produce. So if that's an important bit of information to you, now you know.

Many of the 4-digit codes are listed on the Fruit Labels Site, which is a site for people who collect those pesky little stickers as a hobby. Wow, who knew?

Tuesday, April 29, 2008

An almost 100 foot meal in April

A fresh crop of brand-new asparagus, the first of the season, inspired this almost 100-foot Diet Challenge lunch this weekend: a pile of freshly-picked, lightly steamed asparagus with mayonnaise (um, of unknown origin), with a salad cut from my cold frame and served up with a dressing made by a restaurant over on the coast (a little more than 100 feet away, but local-ish), and a slice of my super-duper apricot and walnut and other good stuff homemade breakfast bread and some Tillamook butter.

The DH was away for the weekend and I couldn't let all that good asparagus go to waste, now, could I? Mmmmm...

Friday, December 21, 2007

Christmas goodies: Springerle (anise cookies)

Anise is easy to grow and is lovely in the garden, with its feathery and frilly leaves. It's a great herb for attracting beneficial insects, as the blossoms supply pollen and nectar for beneficial insects to eat. The licorice-scented seeds can be harvested to save for next year or for cooking.

But what do you make with anise seeds?

Springerle, of course!

Springerle are one of the traditional cookies that my grandmother made every year. These are floury, no-fat cookies flavored with anise seeds and adorned with decorative pictures from a special carved roller or wooden mold. Grandma always kept the cookies in a gallon-sized glass jar. Hers were generally hard enough that they required dunking in coffee to make them edible, though I always liked gnawing on them without dunking them. I guess I'm just weird that way. My springerle are a considerably softer, which I suppose has to do with how long they dry before baking. This year's batch is slightly tan because (oopsie) as I was mixing them I discovered I was one cup shy of the amount of unbleached flour that I needed, so I added a cup of whole wheat flour.

It takes two days to make the cookies. The dough is mixed and the cookies are shaped in the first evening, then baked the next day after they dry overnight. For best flavor, make the springerle a week or two before Christmas to allow the flavor of the anise seeds to permeate the cookies. Store them in a tightly-closed container while they season so they don't turn rock-hard.

This recipe will make 5-6 dozen small cookies.

Springerle
4 eggs
2 cups of sugar
1/8 teaspoon salt
4 1/2 cups of flour
Anise seeds

Beat the eggs until they are thick. Slowly add the sugar and salt and continue beating 5 minutes with an electric mixer or 15 minutes by hand. Stir in the flour about 1/2 cup at a time. The dough will be stiff.

Divide the dough in half. Shape in to a slab slightly more than 1/4 inch thick and the width of your springerle roller or wooden mold. Roll the dough with the springerle roller to press the pictures into the cookies. Cut the cookies apart. If you don't have a springerle roller, roll the dough out to 1/4 inch thick and cut into bars 1 inch wide and 1 1/2 inches long.

Lightly grease two cookie sheets and sprinkle thickly with anise seeds. Place the cookies on top of the seeds. They can be fairly close together because they will not spread during baking. Cover the cookies with a cloth and let them dry overnight.

The next morning, heat the oven to 375 degrees. Place the cookies in the oven and immediately reduce the temperature to 325 degrees. The initial heat sets the design. Bake for 15 minutes. Remove from the sheet and allow to cool, then store in a tightly closed container. Seeds that were left on the sheet after the cookies were removed can go in the bottom of the jar to add to the anise aroma.


Essential tools: Grandma's springerle roller and her favorite cookie cookbook, dated 1941.

Thursday, December 20, 2007

Christmas goodies: Knock-their-socks-off Pumpkin (or squash) Pie

The frustration for a gardener who has grown some lovely pumpkins or squash for eating is this: you go to the recipe book to find a good recipe for your pumpkins, and what does the recipe call for? "1 can of pumpkin." True, that's the usual form of pumpkin that most Americans are familiar with, but there's nary a suggestion of how much pumpkin comes in one can. One wonders how it came about that pumpkin for eating comes only in a can, while the real things, the orange globes that appear in the stores in the fall, are only for carving. Squash, when it's thought of at all, is more likely to come frozen in a plastic bag that as a whole squash.

So for gardeners or farmer's market buyers, here's my secret recipe for pumpkin pie, which can also be made with squash (which, after all, is really what's in those cans labeled "pumpkin").

When the in-laws are coming over, or you have special guests, or you're trying to butter up the entire office at the annual Christmas party, try serving up this pie. The special spice mix and the vanilla make it yummy enough, but the secret sock-knocking-off ingredient is the rum extract. If you can find real, genuine cinnamon, you're in for an even nicer treat. The stuff sold in the U.S. as "cinnamon" is actually cassia bark, which is cheaper but coarser and has more of a bite. You have to find a specialty spice shop such as Penzeys to find real cinnamon. I haven't yet experimented with using fresh ginger instead of ground, but I may have to try that sometime. To be really genuine, you can use cream instead of canned evaporated milk, but I don't think my arteries would forgive me for that even if my mouth would be in heaven.

First, of course, you have to have some cooked pumpkin or squash. I used butternut squash grown on a local farm for this pie. I grew up hating squash because all I'd ever tried was acorn squash from the grocery store that my mother used to cook with brown sugar, which never did hide the bitterness. Then I tasted butternut. What a revelation. Mellow, sweet, almost as nice as a sweet potato. To cook a butternut squash, I cut it in half lengthwise, remove the seeds, brush with olive oil, and roast cut-side-up at 325 degrees for about an hour. I scoop out the flesh, mash it, and whatever I don't need for the recipe I'm using I freeze in 1 cup portions in plastic bags. If you press the bags flat, they freeze and thaw quickly.

Knock-their-socks-off Pumpkin or Squash Pie

Mix together:
3/4 cup sugar
1/2 teaspoon salt
1 teaspoon cinnamon
1/2 teaspoon ground ginger
1/2 teaspoon nutmeg
1/4 teaspoon cloves
1/4 teaspoon allspice

Set the sugar and spice mixture aside.

In a blender, put:
2 cups cooked pumpkin or squash
1 can of evaporated milk (regular or nonfat)
2 eggs
1 teaspoon vanilla
3/4 teaspoon rum extract

Blend until smooth.
Slowly add the sugar and spice mix and blend together.

Pour into a prepared pie shell (regular pie crust, graham cracker crust, or whatever your heart desires). I use a deep-dish 12-inch pie pan to hold all this filling. It will also fill two 8-inch pie pans. Sprinkle the top with nutmeg if you like. Bake at 425 degrees for 15 minutes, then turn the oven down to 350 degrees and bake another 40 minutes. The middle will puff up and will still be wobbly when done, but a knife or toothpick inserted in the pie should come out clean. Let cool about 2 hours before cutting. Refrigerate once it has cooled.

Serve with whipped cream. My husband insists on naked pumpkin pie, but I learned better when I was growing up.


Pumpkin pie. Fully dressed. On Grandma's vintage china. Mmm-mmm!

Wednesday, December 19, 2007

Christmas goodies: Lavender Shortbread

Mmm, it's the time of year when the baking begins. My grandmother used to begin her Christmas baking sometime around Thanksgiving, and on Christmas Eve, here came Grandma with a mountain of tins, jars, and boxes of cookies, fudge, divinity, candied nuts, kolace (Czech sweet buns with fruit topping -- Grandma's parents immigrated from Bohemia), pumpkin pie, mince pie, hard sauce, Christmas bread, and all the glories of holiday goodness. My brothers and I ate our way through Christmas vacation with Tom and Jerrys (sweet batter, hot water, rum and brandy -- only a dab of the booze for flavor for us kids) to wash it down. Sometimes leftovers went in the freezer -- if there were any leftovers with three kids in the house and relatives coming to visit.

I can't say I've kept up with Grandma's output, but I do make at least three or four different cookies, some Christmas bread, and pumpkin pie. Some of the cookies are traditional, some I've added over the years, and while I don't strive to do all the traditional cookies ever years, I do make sure I do one or two.

The pie plate in the picture above holds traditional Scottish shortbread -- my father's father's family came from Scotland -- with my own touch from the garden: a hint of lavender. It's easy, delicious, and really truly, the calories don't count when it's a holiday. Or so I tell myself. Be sure to use real butter, or at least one of those butter-margarine blends, because it really does make a difference in flavor. So does the real vanilla.

Lavender shortbread
1/2 cup butter (room temperature)
1 cup unbleached flour
1/3 cup powdered sugar
1/2 teaspoon vanilla
1 tablespoon dried lavender blossoms

Grind the lavender blossoms in a mini food processor or in a mortar and pestle. Mix with the flour. Add the sugar and mix well. Using a pastry cutter, cut the butter into the flour until it forms fine crumbs. Sprinkle on the vanilla and blend in with the pastry cutter. Press into the bottom of a 9 inch pie plate or cake pan (or a shortbread mold if you have one). Bake at 325 degrees for 20 to 25 minutes. Cut into 16 equal wedges while still warm. Leave in the pan to cool, and remove when it is completely cool.

Now doesn't that look delicious?

Tuesday, August 22, 2006

Superfoods! Article 2: Beans

"The Army gets the gravy but the Navy gets the beans, beans, beans, beans..." goes the song, and indeed, beans have gotten a bad rap over the years as a cheap protein substitute. Long have beans been the food of the poor, and during the two World Wars, beans were promoted as a meat substitute for meatless meals during times of rationing.

But a mere substitute? Beans deserve a better reputation than something to fill up the kiddies while the meat-eating men march off to war. According to SuperFoods Rx (see SuperFoods! Article 1), beans are a low-fat source of protein, are full of fiber, and contain a good dose of B vitamins, iron, folic acid, potassium, magnesium, and a variety of plant pigments collectively known as "phytonutrients." The fiber in beans has been shown to lower cholesterol in people with cholesterol problems, so not only do beans "substitute" for meat, they also help control some of the problems associated with eating high-fat protein foods. Beans have been found to help stabilize blood sugar, so they may be useful for people with type II diabetes. Beans may also help reduce some cancers, particularly colon cancer. Of course, some people have a problem with -- er -- the "inflatable effects" of beans. People who eat beans frequently tend to produce the enzymes necessary for digesting them, and have fewer problems. For those who just can't eat beans without the musical after-effects, it's Beano to the rescue! This product, in liquid or tablet form, contains the enzymes that will solve the problem.
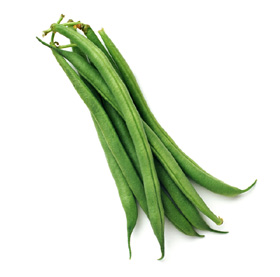
The superfoods "beans" group encompasses most legumes, including dried beans, lima beans, lentils, green beans, fava beans, and garden peas. Think of the variety of flavors, colors, and cooking methods!

True beans are summer crops, usually planted late in May and ripening late in the summer. Because beans are legumes, they form associations with nitrogen-fixing bacteria that create nodules on the roots of the plants; hence beans and their bacterial friends put nitrogen into the soil, and beans don't require much in the way of fertilizers. In fact, too much fertilizer will make beans run all to leaves and produce too few flowers and pods.

Most beans will need a trellis to climb on. The good old "bean teepee" is easy to make from bamboo poles. Tie a half-dozen or so poles about six or more feet long together at one end, and sink the opposite ends in the ground. Run string around and around them as you would string lights around a Christmas tree, winding the string around the poles themselves to anchor it. You can also run twine between two sturdy stakes, running it across the top and about six inches from the bottom, then run twine up and down vertically between the two horizontal strings. Or run deer netting or bird netting between two tall stakes. Either of these will provide support for a row. Keep the beans watered well for full growth.

Beans can be picked when green to steam, stir-fry, use in soups, or freeze. To freeze beans, trim the ends and cut into pieces, blanch in boiling water for three or four minutes, and cool immediately in ice water before putting in freezer-safe containers.

Bean pods can also be left on the plant to dry if you want to grow dry beans. While dry pintos, navy beans, and garbanzos are cheap to buy in the stores (and can, incidentally, be used as cheap seed source), more exotic, flavorful heirloom beans must be home-grown. Want a full list of heirloom bean varieties? Try The Bean Bag. The more colorful the beans, the higher levels of substances called polyphenols. These phytonutrients are important antioxidants. Dry beans are super in soups, can be served cold on salads, or used for bean dips. Try a traditional French cassoulet for a warm winter meal.

Fall and spring are the time to plant two other important members of the bean group: Fava beans and peas. Favas are much better known in Europe than in the U.S. These broad beans have skins with a slightly bitter flavor that some people love and others detest. The immature beans can harvested when they're thumb-nail sized. They can be simmered until tender, sauted lightly in butter, then seasoned with salt, fresh thyme, and a good vinegar for a full, rich flavor. The vinegar helps alleviate some of the bitterness. Favas are also great in soups.

Favas for planting are huge, and should be soaked before planting. Late in the summer, plant them in rich soil where you've pulled out summer crops. They'll enrich your potato patch. They're also a good follow-up crop to corn. The plants will get a head start in the warm days of late summer, grow very slowly in the winter, and produce a crop in the spring. They can also be planted as early in the spring as the soil can be worked.

Peas are a familiar garden favorite, and another member of the bean group. Peas are most often served as fresh, immature peas, lightly simmered. Traditional peas are harvested for their seeds, but snow peas are eaten as immature pods, and sugar peas are eaten at a more mature stage, pod, seeds, and all. This gives the gardener a lot more food for the effort. Still, there's nothing that can beat the taste of fresh petite pois peas, barely simmered, and seasoned with butter and a touch of dill.

My grandmother always said to plant peas on Washington's birthday. That may be a little early for those north of zone 8, but the idea is to plant peas as early as the soil can be worked. Peas benefit from the use of pea innoculants, which add those nitrogen-fixing root-nodule-making bacteria to the cold soil. Soak the peas, toss them with a light coating of the innoculant, then plant immediately, sinking the peas about two inches into the soil. Early planting helps prevent pea enation, a fungal disease that strikes in early summer. Spring-planted peas are usually ready in June. Many parts of the country can get a second crop of fall-planted peas as well.

With the wide variety of beans available, it shouldn't be too hard to get the recommended four 1/2 cup servings per week.

Superfoods! Article 1: The book

Have you seen SuperFoods Rx?

Dr. Steven Pratt and co-author Kathy Matthews teamed up in this book to present fourteen categories of food that have super health benefits. Now mind, you, I've been teaching science for, oh, quite a few years (longer than I care to admit), and I have a pretty critical stance when it comes to health claims. Most diet books that I've seen are worthless (all that talk of "detoxifying," claiming that it's toxins that make you fat, is bogus -- "detoxifying" teas are mostly diuretics, as are the "fat flushing" potions). But SuperFoods Rx impressed me. It has its share of hype -- it's hard to get a health book published and noticed these days without resorting to hype -- but most of the claims are backed by real research that appeared in real research journals, not vague claims of "some studies suggest..." or support from various unscientific testimonials.

All of the foods in the book contain more than the usual vitamins and minerals. Pratt goes into various anti-oxidant, anti-inflammatory, and otherwise health-enhancing substances in common foods, from the isoflavones in soy, to omega-3 oils in fish and leafy greens, to the colorful lutiens, xanthophyls, and anthocyanins in fruits and veggies. The best part is that you don't have to search the back shelves of esoteric health food shops to find these super foods. You can find them all at your grocery store -- or better still, most of them you can grow yourself to get the full benefits of fresh, organically-grown food!

So, as we move into fall harvest time, winter gardening time (for those of us in mild climates), and winter garden planning, I'll be running a series of articles on how to grow foods in most of the groups of superfoods. I'll skip over turkey (low-fat protein, high in three B vitamins, iron, selenium, and zinc, and supportive of the immune system), since I don't know anything about poultry-raising, and likewise I'll skip wild salmon (high in omega-3 fatty acids, B vitamins, and selenium, since it's not exactly something you can plant in your raised beds. As for the whole grains group, I'll discuss corn and a few other garden-appropriate grain foods, but leave the growing of oats, wheat, and rice to the farmers.

That still leaves plenty of superfoods you can grow in your garden or your kitchen, so we'll begin at the beginning of the book with the next article: Beans.

Monday, July 03, 2006

Currant Jelly

From gorgeous fresh currants like these...


...comes magnificent, anti-oxidant-loaded, extremely delicious jelly like this:


But alas, as my entire harvest from my one-year-old currant bushes was all of one quart of mixed red, black, and white currants (mostly red and white), including stems, that's all the lovely currant jelly I got for this year! It was worth it, though, and the last of it adorned my English muffin this morning.

The jelly is about the easiest jelly I've made, since currants have plenty of pectin in them and don't need additional pectin to jell. In fact, I cooked this batch just a little too long and my jelly had almost the texture of jujubes. Took a bit of energy to spread the stuff. But oh, it tasted good.

Here's how to make it:

Start with several quarts of fresh-picked currants of whatever color you fancy, or a mixture therof. Don't bother to pick off the stems, since the whole mass will be strained for the juice. Put in a kettle with a little water, turn the heat on medium, and simer until the berries are soft. Mash a bit with potato masher or a whisk for more juice (or leave them be if you want the clearest juice).

The best thing to use to strain the juice is a jelly bag. If you don't have one, cut a big, big square of cheesecloth. Two single layers will do. Place the cheesecloth in a collander, and place the collander in a pan. Pour your juicy cooked currants in the collander. Let most of the juice drip through, then gather up the edges of the cheesecloth, tie with string, and hang from a knob on a cupboard over the pan and let it drip. If you want, you can squeeze the bag to get every last bit of juice out of it, but if you'll get the clearest jelly if you don't.

Measure the juice. For every cup of juice, add one cup of sugar. Put no more than 4 cups of juice and sugar mixture in a heavy-bottomed pan on the stove and bring to a boil, then reduce the heat and simmer. To test to see if the jelly is done, take some up in a large spoon and let it pour off the side. If it dribbles thinly, it's not ready, but if it pours in one semi-thick mass from the spoon, it's ready. Or dab some on a very cold plate and see if it sets up. My jelly took about 5 minutes to reach this stage. A full 4 cups should take 8-10 minutes. But do test from time to time.

To preserve the jelly, pour into clean, hot, sterilized half-pint jelly glasses, leaving about 1/2 to 1/4 inch of space from the top. Place a clean, hot lid on top and put on a screw ring tightly. Turn the jar over and let it cool completely. This nearly always creates a seal when the jar is turned upright again. Don't try to seal a half-jar of jelly. Instead, put it in the refrigerator for your morning muffins.

Red, white, and blueberry pie

Now that's what I call dessert. I'm taking two of these beauties to a 4th of July picnic tomorrow. The blueberries came out of my garden, but alas, I had to go buy the strawberries since my plants just went in this year and aren't producing well yet. All it needs now is a decorative bit of whipped cream for some visible white -- though there's white creamy stuff under the berries.

Here's how you can make one yourself:

Red, white, and blueberry pie

Start with one pre-made graham cracker or cookie crumb pie shell, store-bought or made yourself.

Put one 8 oz package of lowfat cream cheese in a mixer. Blend with about 1/4 cup powdered sugar (more or less to taste), 1 teaspoon of vanilla, and 2 tablespoons of milk. Whip until smooth and creamy. Spread on the bottom of the crust.

Wash 1 quart of strawberries. Remove the hulls. Place pointy-side up in the cream cheese. To make cutting the pie easier, I cut the berries in quarters, but keep the quarters together as I press them into the cream cheese.

Sprinkle about 1 cup of blueberries over the strawberries.

For the glaze, mix 1/3 cup of sugar with 1 tablespoon of cornstarch and 1 tablespoon of strawberry gelatin mix in a small saucepan. Mix in 1/3 cup of water. Bring to a boil, then boil 1 minute. Use a gravy ladle or large spoon to pour the glaze over the berries. Refrigerate 1-2 hours or overnight. Garnish with whipped cream.

(If you buy a crust, save the plastic liner. Turn it over to make a nifty pie cover to protect your masterpiece if you have to transport it somewhere. Just lift the edges of the pan as you had to do to remove the plastic, put the "lid" in place, and push the edges of the pan back down again.)

Monday, June 19, 2006

Green Blog Project

Foodie gardeners will want to check out Ginger and Mango: Green Blog Project. The author wants her readers to grow something themselves, make something to eat out of it, and post the picture of what they grew along with the recipe. This was just a quiet little food blog, but the Green Blog challenge seems to have upped the traffic many-fold. What food-loving gardener could resist?